If you’ve ever tried to dye Easter eggs and had your dye turn out a different color than expected, you’re certainly not alone. Maybe that green was actually supposed to be teal. Or maybe whatever shade you were going for wound up being a dingy brown instead. Don’t fret — we’ve all been there.
But, thanks to McCormick, that doesn’t have to happen this year. Oh no, no more mishaps for you! Your egg-dyeing skills are about to get a major upgrade in 2018.
Why Settle For Less Than Perfect Eggs?
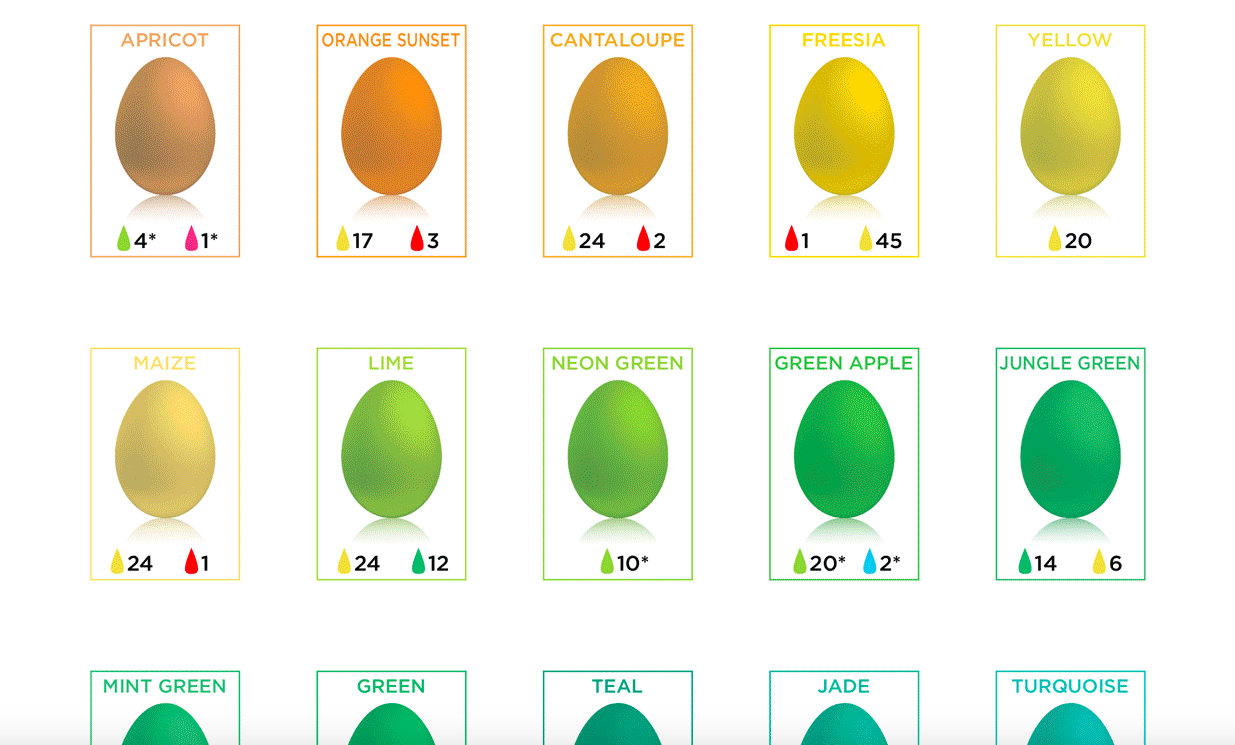
McCormick created a chart that lays out exactly how to get the desired color.
Want to get in on that trendy shade of dusty rose with your seasonal decorations? You’ll need precisely 14 drops of red and six drops of blue, as outlined in the guide below.
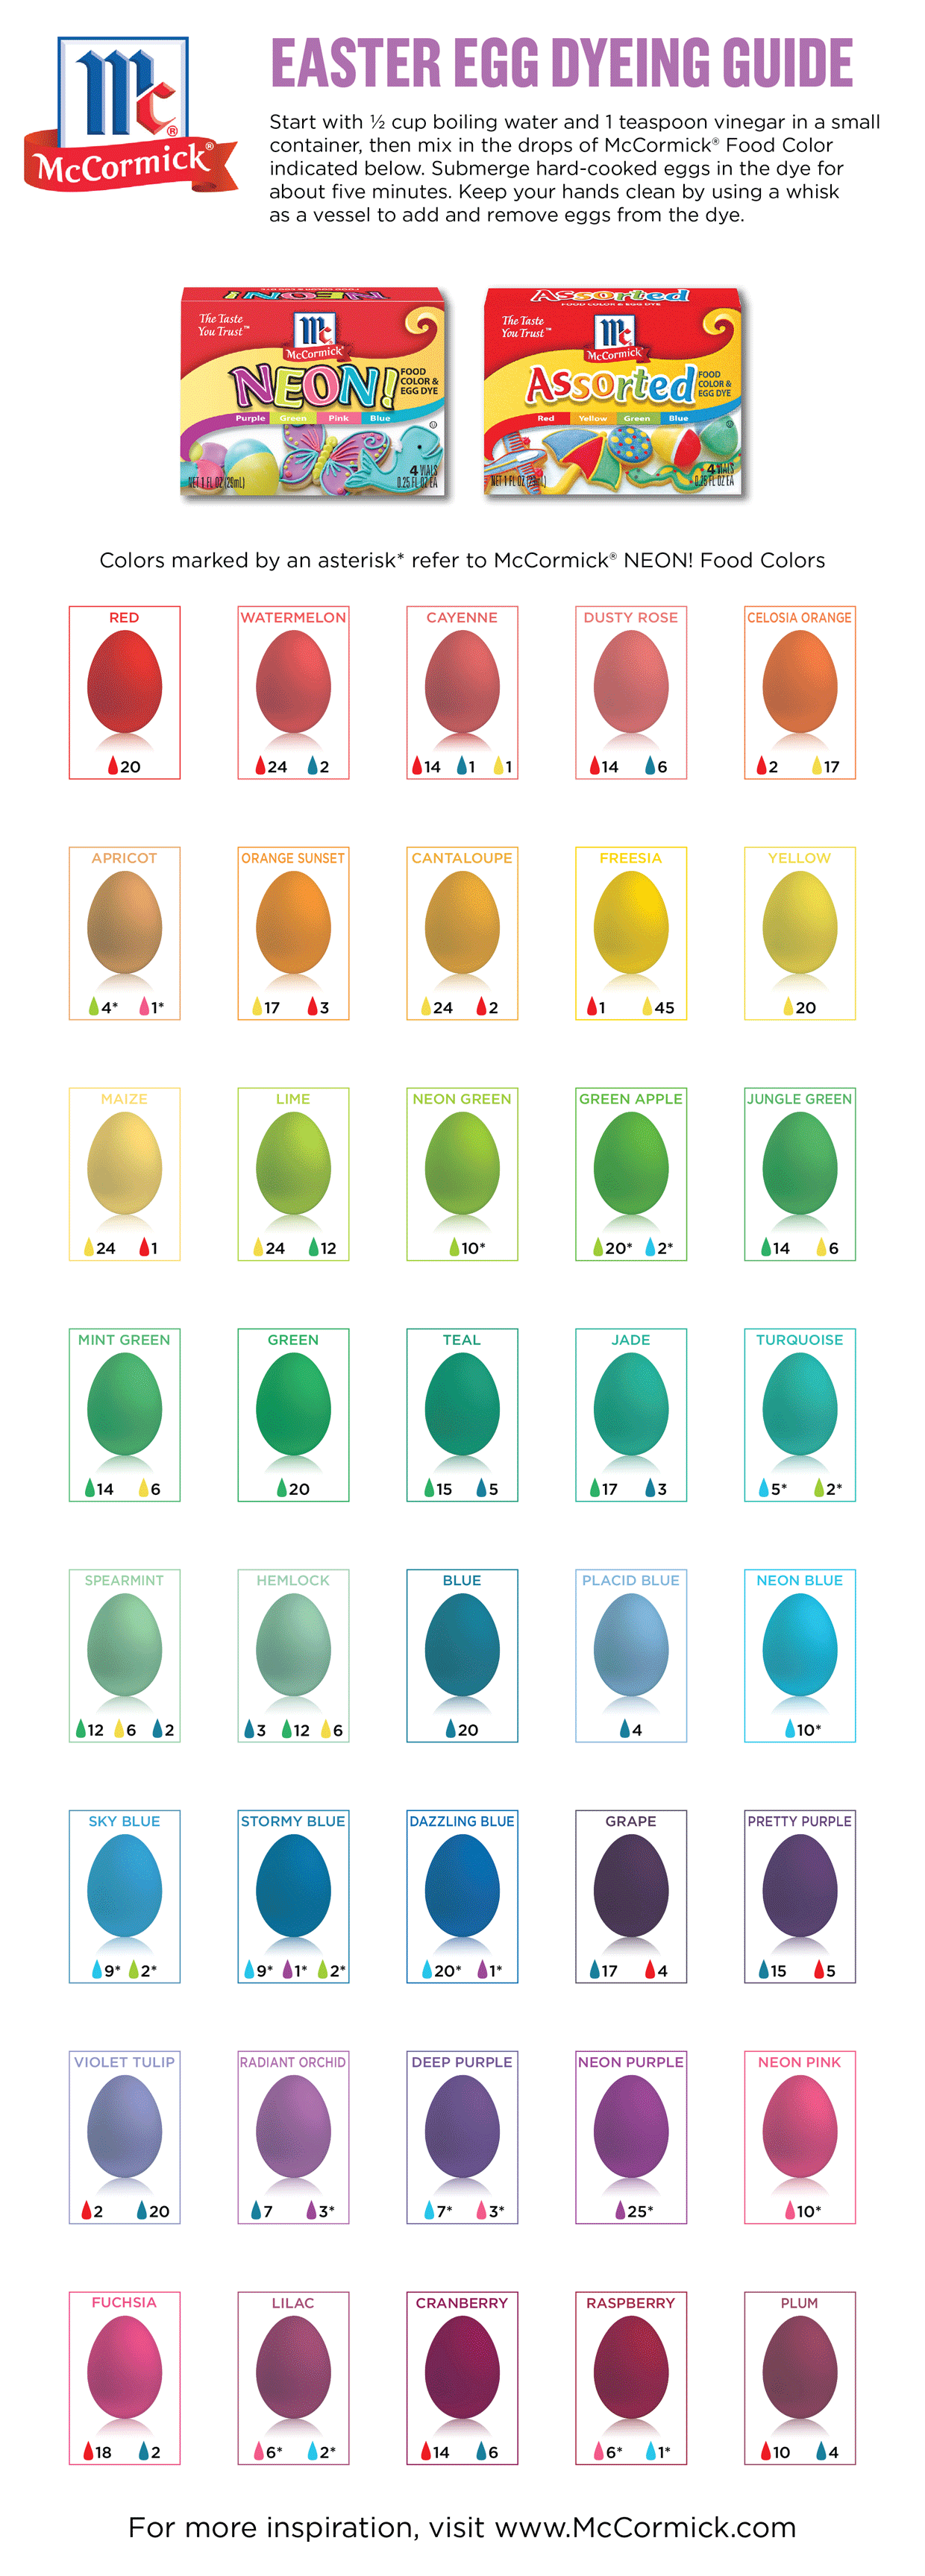
Need help with more than just the color? McCormick’s really laying it all out for you! According to this nifty chart, you’ll need 1/2 cup of boiling water and one teaspoon of vinegar to get started. Then, add drops of dye and submerge the egg for about five minutes.
And there you have it, the best Easter eggs you’ve ever made.
More Cool Eye-Dyeing Tips
If you’re already a pro at the whole egg-dyeing thing, you may want to step it up a notch. If that’s the case, Pinterest definitely has your back!
You can make beautiful swirled eggs using dye and shaving cream instead of water. If you have young children who are likely to want to taste the colorful concoction, substitute Cool Whip for shaving cream.
RELATED: 11 Easter Egg Hunt Ideas To Take Your Hunt The Next Level
The Crafty Morning blog has a tutorial that explains the whole process.
Basically, you start by squirting white shaving cream onto a cookie sheet and spreading it out evenly. Then, drip different color food coloring onto the shaving cream. Take a straw or some other handy utensil to swirl the colors together and make a tie-dye look.
Then, just roll an egg on one side into the corner of the sheets and flip it over. Let it sit for 10 minutes so the food coloring can dry. Finally, rinse the egg clean, and you’re all set!
For more help, you can watch the step-by-step process in this video from Crafty Morning:
Or try your hand at adding super-cool designs to the eggshells with rubber cement. Find out how over at Unsophisticook.
If you really want glam Easter eggs, decorate them with glitter. You’ll need plastic eggs, glossy Mod Podge, clear acrylic gloss spray paint, extra-fine glitter, paper and a foam brush.
It may not be the least-messy DIY project you’ve ever done, but the results are so pretty! Untidy Artist has a tutorial video that explains how to make these sparkly eggs.
Clearly, nailing the color is just the beginning when it comes to decorating Easter eggs. There’s still time to up your skillset, so make sure you’re going over these online tutorials before the big day arrives.
With tips like these at your disposal, there’s no way you could have anything but a beautifully colored Easter, and what more could you hope for, really?
RELATED: Here are four more chic ways to decorate your eggs this Easter!