The Best Kid’s Water Table
Our Review Process
Don't Waste Your Money is focused on helping you make the best purchasing decision. Our team of experts spends hundreds of hours analyzing, testing, and researching products so you don't have to. Learn more.

Our Picks For The Top Water Tables
- 1. Simplay3 STEM Giant Water Table
- 2. Step2 Rain Showers Splash STEM Waterfall Kid’s Water Table
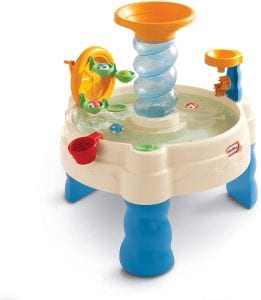
- 3. Little Tikes Frog Pond Water Table
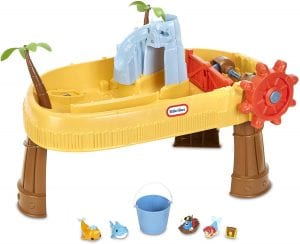
- 4. Little Tikes Spiralin’ Seas Early Motor Skills Water Table
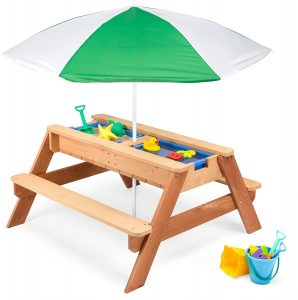
- 5. Best Choice Kids Adjustable Umbrella Picnic Water Table
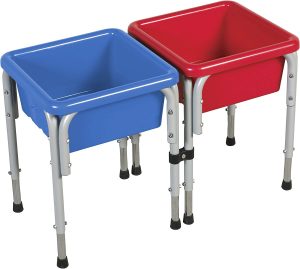
- 6. SOWOW Compact BPA-Free Sensory Kid’s Water Table
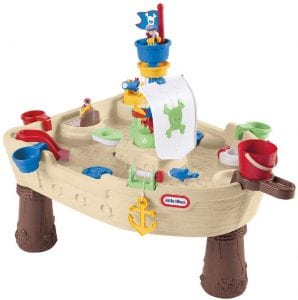
- 7. Little Tikes Anchors Away Interactive Pirate Ship Kid’s Water Table
- 8. Little Tikes Island Wavemaker Built-In Play Kid’s Water Table
- 9. ECR4Kids Easy Clean Lidded Kid’s Water Play Table
- 10. Little Tikes Fountain Factory Interchangeable Pipes Kid’s Water Table
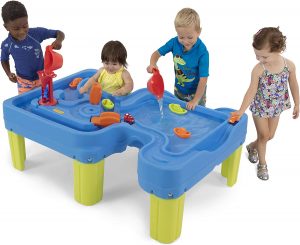

Since this water table can be used by multiple children at once, it's an excellent pick for daycare or preschool centers, as well as big families. The table is made from a durable plastic that is easy to care for and comes with a total of nine accessories to enhance play.
Great for DaycaresThis water table features a large pool area, a lazy river and a vehicle track for cars and trucks.
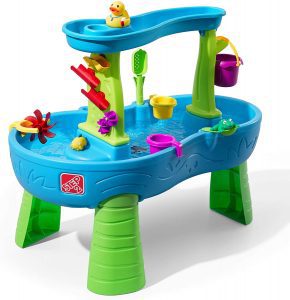
Your little ones will love the sensory play with this kid's water table, thanks so all of the accessories. This set includes two spinning pieces, three maze pieces and much more. Plus, the rainfall effect is sure to capture your kids’ interest.
For Sensory PlayThis kid's water table is full of fun accessories like a waterfall and spinning wheel.
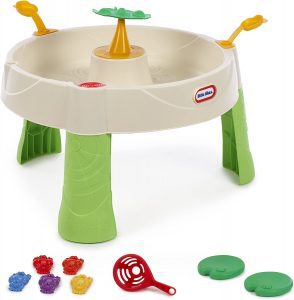
If your toddler is a fan of nature, they will love playing with this sand and water table for toddlers. They can launch frogs onto the lily pads and turn a spinner to power the lazy river. The table holds seven gallons of water.
For Nature LoversThis sand and water table for toddlers has frogs, lily pads and a lazy river.
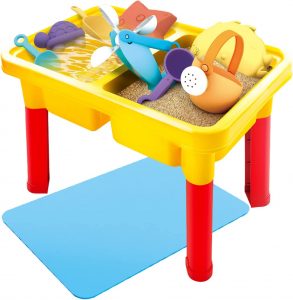
The bright yellow color of this sensory table is sure to appeal to young explorers. Parents can fill the table with either sand or water and there's even a cover to keep the content safe when not in use. Since the table weighs just over 2 pounds, it's easy to move from inside the house to outside on the lawn.
Lots of AccessoriesWhen you opt for this sensory table, you'll get 15 accessories, including a spinner, pyramid, shovel and rake.
Buying Guide
There is nothing quite like splashing around in a water table on a hot summer day. A kids’ water table is a large sensory toy that facilitates their interaction with water in a safe and mess-free way. Usually a large round or square tub held up by three or four legs, a water table is a place to play with toys while getting their hands wet. Often, kids’ water tables come in bright colors, have unique water features like little slides and Ferris wheels, and are the perfect height for toddlers and preschoolers. Sometimes, kids’ water tables also have a compartment for sand to double the sensory experience.
One of the biggest benefits of playing with a water table is developing fine motor skills. The unique feel of the water against the toys adds a sensory element, and kids can explore using cups to pick up water and pour it out. It’s also a great way to learn about temperature, as the water often feels cool against the skin.
It’s never too early to learn about mathematical concepts like volume. Kids can have fun while figuring out how much water fits into a small cup versus a large cup. Even scientific concepts like physics are introduced to toddlers and preschoolers through water play. Children can learn about motion by looking at flowing water, and figure out which objects will sink and which will float.
By learning about these new concepts, kids can develop their language and increase their vocabulary. They also have the opportunity to pretend play at the water table, which helps to foster creativity and collaboration with other children. A water table is a great place to develop social skills, as many children can play around it at one time. Kids can learn about cooperation, sharing, negotiation and conflict resolution.
What to Look For
- When you’re looking for a kids’ water table, one of the most important elements to consider is size. Some water tables are smaller and best suited to one or two children to play with at a time. Others are bigger and can accommodate several children at once. Think about how many kids will want to play with the water table at one time.
- The features of the water table are what make it truly fun. While pouring and splashing are great activities, kids can up their sensory activity with the unique elements of each water table. Some come with a waterfall compartment, where kids can pour in water and watch it flow beneath. Others come with swirling slides they can push their toys down on. Some water tables have features like tunnels, valleys and peaks, which help teach kids about scientific and mathematical concepts. Consider what your kids will find the most engaging.
- If you want to double the sensory fun, look for a kids’ water table that has two separate compartments. This way, you can dedicate one section to sand and one section to water. Keep in mind that the two may end up mixing unless there is a lid that you can place on one side while playing with the other.
- Some water tables have adjustable heights, so the water table can grow with your kids. This provides them with more opportunities to comfortably play with the water table as they get taller.
- Take a look a how complex the assembly process is when buying a kids’ water table. For most of them, you will need to attach the legs of the base to the water compartment, as well as add on the play features.

More to Explore
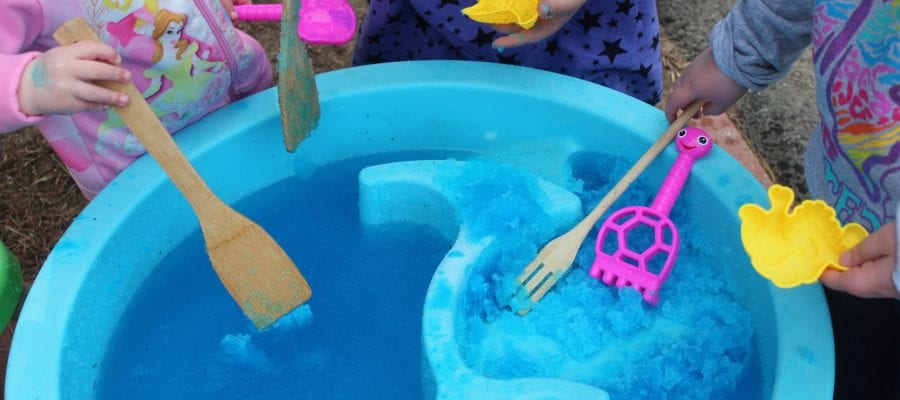
Playing with plain old regular water is still a blast for toddlers and preschoolers. However, if you want to make it even more engaging, consider adding a few drops of food coloring to the water. You can even add a couple of drops of bubble bath soap to the water to create lots of fun suds to play with. If you want to change the sensory experience, add a dozen ice cubes to the water table. This is ideal for a hot day. You can also add in water beads which change texture when wet and help kids build their fine motor skills.
Latest Reviews