The easy DIY way to fix your car’s front-end alignment

Do you have any idea what front-end alignment is?
When mechanics talk about your car’s alignment, they are referring to the way its tires align with the road. Improper alignment can be really bad for your car, but unfortunately there’s no handy notification light that shows up on your dashboard when it happens.
Signs Your Car’s Alignment Is Messed Up
Fortunately, there are some telltale signs your car’s alignment is out of whack:
- The car pulls to one side when you’re driving.
- The steering wheel is crooked when you are driving straight.
- The car’s tire treads are unevenly worn.
Firestone recommends getting your car’s alignment checked every 6,000 miles and says improper alignment can shorten a tire’s lifespan by thousands of miles.
Having a mechanic perform a front-end alignment costs about $50 to $75, according to Angie’s List. But luckily some creative people on the internet have come up with a DIY hack to make it easier and much cheaper to adjust your own front-end alignment.
As with any car maintenance, it’s probably best to consult a professional mechanic, but if you feel comfortable trying this yourself, here’s a step-by-step guide to aligning your front wheels at home using common items such as two tape measures and a pair of bricks.
Step 1: Check Your Owner’s Manual
Before doing any work on your car, always consult the owner’s manual for the proper specifications of your car. When checking alignment, the important specs to know are your car’s ideal toe-in/toe-out measurement (the inward or outward direction at which the tires are pointed when looking at the car from its front) and its camber (the vertical angle at which the wheels tilt, affecting how flat they are when they hit the ground).
For our purposes, we will be focusing on the car’s toe-in/toe-out measurement. Toe measurements vary from model to model but Mobil says a car’s front tires should be slightly pigeon-toed, pointing inward from 1/32- to 1/8-inch.
Step 2: Gather Your Materials
There are dozens of DIY alignment hacks online but the simplest one we found was from Jalopnik, which recommends using two 24-inch pieces of angle iron, two identical tape measures, two bricks and your car’s jack, which should be located in the spare-tire compartment of the trunk.
For this job, jacking the car up is apparently optional, as we found several methods that left the car on the ground, including this easy video from Ratchets & Wrenches:
Step 3: Loosen Nuts On Tie Rod
The tie rod is what connects your car’s steering rack to its steering arm. It’s basically the piece that allows your steering wheel to turn the front tires. The tie rod can be found between the front two tires, but if you’re unsure where to find it on your vehicle, check the manual or look it up online.
There should be two nuts attached to the tie rod that can be loosened. Once you’ve loosened them, you’re ready to change the alignment of your front tires.
Step 4: Roll The Car Forward and Backward
If you jacked it up, your car should be back on the ground at this point. Now you need to put the car in neutral and push it about 10 feet forward and backward to allow the car to settle into its proper driving suspension.
Step 5: Straighten Your Steering Wheel
Get inside the car and turn the steering wheel until it looks and feels straight. This is your baseline and your tires should be at their straightest when the steering wheel is in this position.
Jalopnik says you can ensure your steering wheel is straight by measuring the rods that come out of both sides of the tie rod. If the measurement is equal on both rods, the steering wheel is perfectly straight.
Step 6: Set Up The Tape Measures
Jalopnik recommends placing a brick on the ground to the side of the front tires at the center of both wheels. Then, you set a piece of angle iron on each brick, with the flat side resting against the tire.
Finally, you bookend the tires with the two tape measures by hooking the metal end of the tape measure onto one piece of angle iron and stretching it to pass over the other piece of angle iron, resting the tape measure’s casing on the ground.
You should be left with two tape measures stretched from one side of the car to the other, resting against the front and back of both front tires.
Step 7: Look At The Measurements
The tape measure stretched across the front of your tires will show how your toed-in or toed-out the wheels are. Again, they should be slightly toed-in, but check your car’s owner’s manual for the desired specs.
Step 8: Make Adjustments To The Tie Rod
If your tires need to be turned inward, the tie rod should be rotated counter clockwise, according to How Stuff Works. If they need to be turned outward, the tie rod should be rotated clockwise. A small turn will make a big difference here, so don’t rotate the tie rod too far.
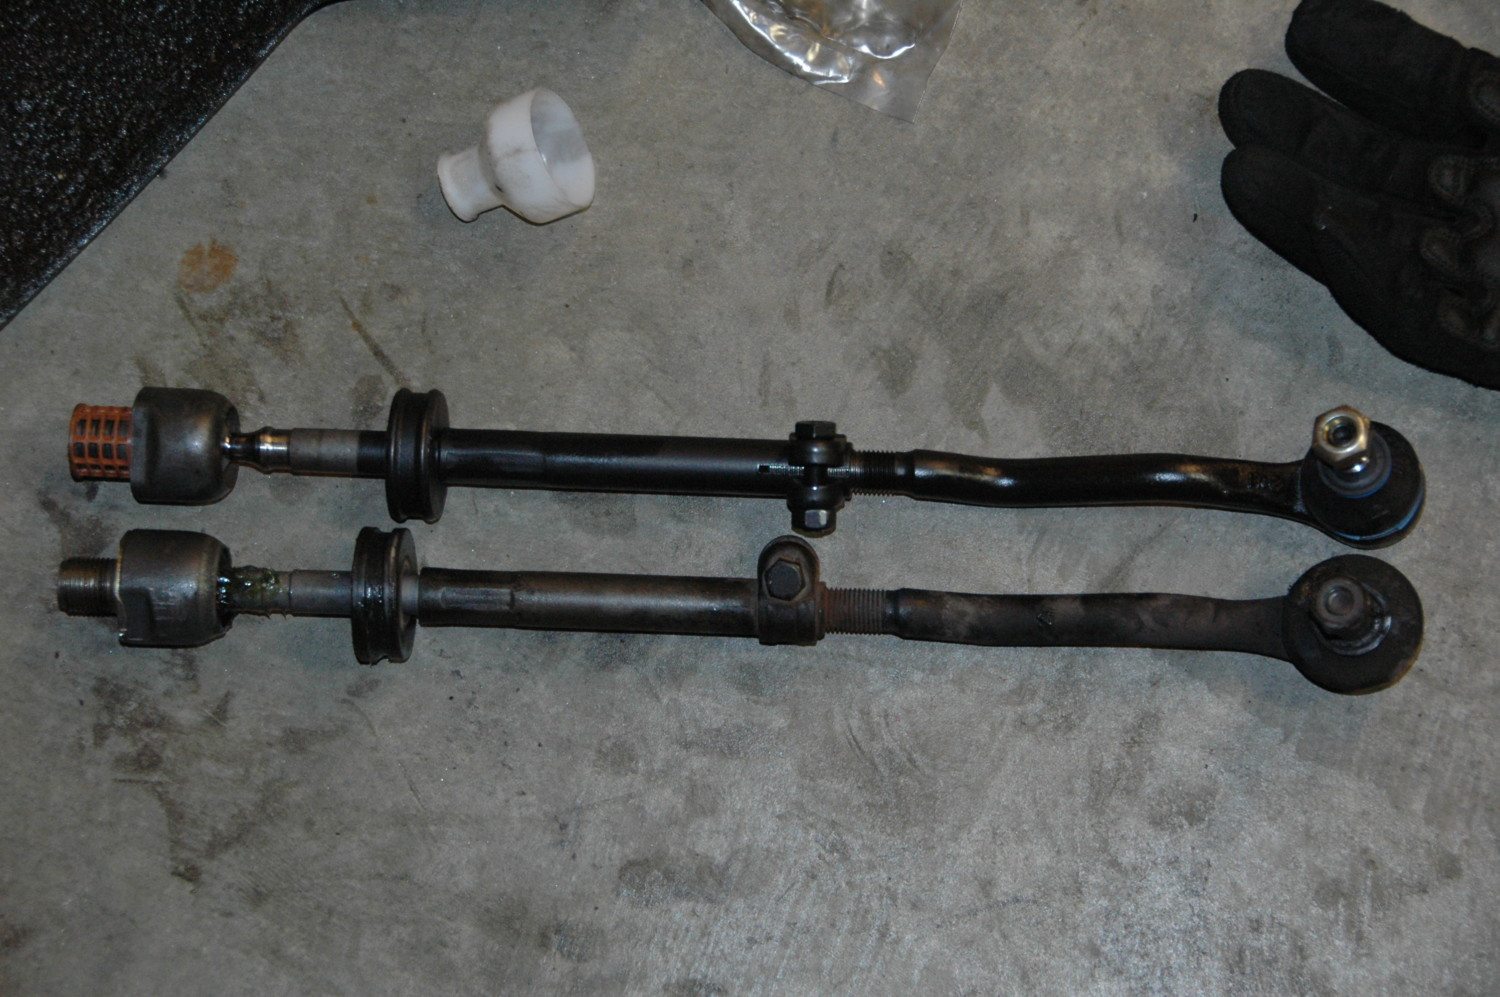
Below is a look at two typical tie rods that are disconnected from a car.
Step 9: Check Measurements Again
After making your adjustments, the tape measures should now either show an even distance from the front and back of your tires or a difference that is acceptable, based on your car’s specs. Continue to make adjustments to the tie rod until the measurements are proper.
Step 10: Tighten Tie-Rod Nuts And Test Drive
When you’re done aligning your front tires, tighten the tie-rod nuts back up and take your car for a test drive. If done correctly, the car should drive perfectly straight when the steering wheel is centered.
Now pat yourself on the back for saving $75. And if you want to keep on saving, check out these other DIY tips for keeping your car in its best shape.


