How To Make Your Own Greek Yogurt—In 5 Easy Steps

Greek yogurt. Not only does it taste good, but it’s also rich in protein. For a while, I was on a Chobani kick, then FAGE. Until I went to my friend’s house and she had me taste some… that SHE made! Wait – You can do that?!
All she needed was yogurt and milk (and a pot, thermometer, and cooler). Simple! Plus, it saves you money – store-bought Greek yogurt is not cheap and often over $1.00 for a 6-ounce container.
There are a few key ingredients you need:
- Milk
- A starter (what?)
Then, a few keys points to keep in mind:
- Make sure you keep it warm enough for the right length of time
- You must strain it properly
Okay, what does the above mean? “Both the milk and the starter you select will impact the taste and consistency of the final product, and you will likely need to experiment some before you hit on your ideal ingredients,” said Molly Sheridan in this Serious Eats post.
Milk
You can use any type you’d like (I think whole milk is the best, which produces a very rich taste, but it’s your call).
Starter
You need a sampling of yogurt in order to produce yours. (The first time I heard this, it sounded confusing, but as you read on, you’ll see it makes sense!) You can just use a few tablespoons of your favorite kind, like plain FAGE (make sure it has live and active cultures, though!). You can also buy a freeze-dried yogurt starter, like this one. (My friend used this and loved the result.)
Temperature
Okay, so this is where it gets a bit tricky. You need to find a way to maintain a temperature of around 110°F for around six hours. “It needs to get to a custard consistency; additional time will increase the tartness of the yogurt,” said Sheridan.
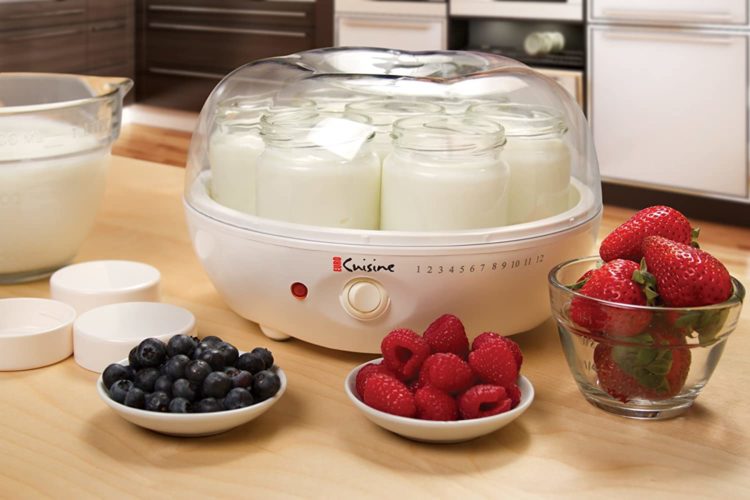
You can purchase a machine like this one (less than $25!) to ensure it cooks at the right heat for the right amount of time. Or, you can get a yogurt-making thermos. You can even put it in the oven, but that seems more inefficient than the above methods.
In her blog post, Sheridan said she opts for the “hot water in a cooler” way (from The Homemade Pantry), which we’ll get to in a second.
Straining
The question is: How much yogurt do you want as your end result?

From all the research I did, I liked Molly Sheridan’s Serious Eats recipe the best (and it wasn’t too complicated!). She uses the “hot water in a cooler” method in the following recipe, but feel free to use your yogurt-maker if you so choose!
Ingredients:
- 8 cups milk
- 4 tablespoons plain yogurt with live and active cultures or freeze-dried yogurt starter
- Yogurt toppings, like fresh or dried fruit, nuts, honey, etc. (optional)
Tools:
- Medium-sized pot
- Whisk
- Spoon
- Fine mesh strainer
- Cheesecloth
- Thermometer
- One small insulated cooler
Storage:
- One quart-sized jars with lids
- One 1/2-pint-sized jar with lid
What to do:
1. Bring milk to 180°F in a heavy-bottomed pot over medium heat. Stir regularly as to not burn or scorch the milk. When it gets to 180°F, have it cool to 110°F. (Sheridan says you can place the pot in icy water to speed things up.)
2. After the milk is 110°F, add the yogurt and whisk away. Combine thoroughly.
3. Pour the mixture into your jars (smaller jar optional). Sidenote from Sheridan: “A useful trick I picked up from Alana Chernila’s The Homemade Pantry is to incubate a small portion of the milk and starter mixture in a 1/2-pint jar alongside the two filled quart jars. Reserve this smaller portion to culture your next batch of yogurt. If using the small cooler method outlined below, you can keep this smaller jar above the water line by setting it on top of a narrow, empty 1/2-pint jar.”
4. Put on the lids and put them into your cooler. Add water, 120°F, until the jars are covered just about to their lids. (This is beginning to sound like a science experiment, right? At least it’s a fun—and edible—one!) Then, close the cooler and go do something else for six hours (give or take, depending on how tart you want the final product to be).
5. After the “incubation” is done, remove the jars and put them in the refrigerator. At this point, culturing will stop and the yogurt will set. Then, wait six more hours. (It’ll be worth it, trust me!)
The Final Result
Now, you can either eat your yogurt immediately… or strain it to make it “Greek.”
To do the latter, put a strainer (a fine mesh one) over a bowl. Then, line it with two layers of cheesecloth. Spoon the yogurt in and let it drain for two hours (again, give or take, depending on how thick you want it; personally, I prefer longer). Sidenote: Sheridan says you can save the extra whey for a future yogurt-making time.
The Final Step
Have some (and refrigerate the rest)! Either enjoy it plain, or spruce it up with several different toppings: granola, dried fruit, fresh fruit, chia seeds, nuts, honey, jam, you name it. The possibilities are endless.
Though making yogurt requires a few tries before you get it just right, it gets better every time, trust me. It’s also a fun gift to give friends, as well as a great reason to invite them over for breakfast.

Related posts